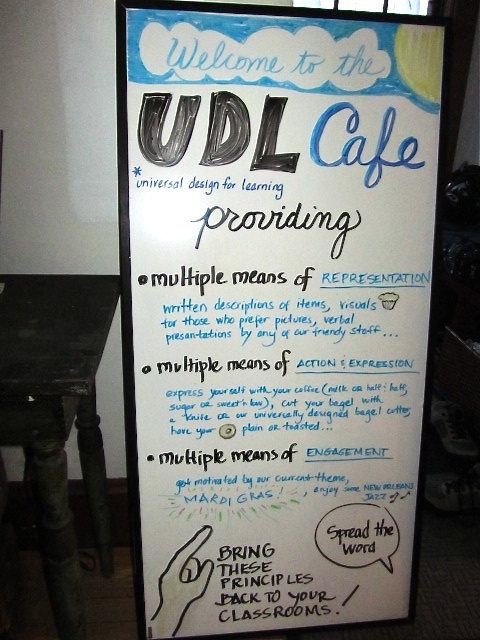
This week I am going to revise my Maker Experiment Lesson I created a few weeks ago with Universal Design Learning (UDL) in mind. UDL is a framework for designing your lessons and curriculum in a way that allows all individuals to learn information, gain new skill sets, and build on their motivation and enthusiasm for learning, while also maintaining high achievement for all learners. If you wish to learn more about this method of learning, check out the video clip below that gives a quick, but through explanation of UDL.
Part One: Revised Maker Experiment Incorporating UDL
Prior to starting the Maker Project, I will need to activate prior knowledge of Letter Writing, Strong Argument Components, and Demonstrative/Procedural essays and speeches, showing strong examples and non-examples. Students will also be given a list of resources for each. Once this has been covered, a brief introduction to the Maker Experiment will be discussed, objectives introduced, and for students to begin thinking of their goals. This scaffold session will be nearly a weeklong process.
I will start the Maker Project lesson by setting up a MaKey MaKey circuit that I can use to play a computer game. During this time, I will be following a how-to essay model that I’ve created to show the students how the circuit is set up by following the directions I’ve written in detail. These directions will be in written format for the students to follow along with me, as well as on my Prezi presentation that I’ve created to supplement the presentation and have added color, visual aids, text features for important information, etc. As I follow the directions, I will also model how to “think aloud” showing things that are going well for me while assembling the Maker Tool, as well as problems that I encounter to show students that it is acceptable to make mistakes and turn them into a positive. Students will also have pieces of the MaKey MaKey on their tables to serve as a visual, as well as something for them to touch. Pictures of the Maker Kit components will also be displayed in the Prezi.
Now that I’ve peaked the students interest I will show a few video clips of other similar MaKey MaKey creations by other kids using the MaKey MaKey website and YouTube. By using examples, I hope to spark the creative juices of the students so that they are enthused about the project.
Once the students understand the concept of MaKey MaKey, the students will be divided into groups, for those that wish to work in a group, using a random group generator. Those that want to work individually may do so. Each group or individual will be expected to create their own MaKey MaKey invention. As the facilitator, I will leave the invention criteria and goals open for them to brainstorm ideas, but may make suggestions for direction as the groups begin the process, constantly keeping their goals in mind.
Once they’ve brainstormed using supplied web links and note-taking tools to create an invention, students will be able use prior knowledge and do one of three things of their choosing, 1) Business Proposal- Write a formal letter, video, a speech, etc. to a local business owner explaining the invention and how it would contribute to their business, 2) Demonstrative Outcome-Write a how-to essay, create a video, draw an illustration, etc. explaining the process of how to put together the circuit including benefits and uses, or 3) Present Your Argument- Create an argumentative essay, debate the topic with another peer, video, etc. either in favor or against, using the maker kits in other classes. The means of completing one of the “Choose” activity is left up to the student or group. Possibilities are endless!
The students will be expected to base their final project on prior knowledge of how each response should be set up and components included in each. Students will be expected to share with the other groups in class and assess their own work as a group. All students will complete a questionnaire to gage their enjoyment, learning, improvement, and thoughts of the project for future assignments.
Part Two: Reflection
Imposing the UDL method into my previously created Maker Experiment Lesson was not as difficult as I thought going into the assignment. Does is take more work in the beginning to plan to incorporate all the resources into a lesson as such? It does. But it far outweighs having to go back a re-teach, risking the fact that you may or may not have engaged all learners, and questioning whether or not enough was done for your lower learners as well as your higher ones. The benefits of UDL are outstanding in that they help those with known disabilities, but also those with unknown learning disorders. It incorporates student-desired outcomes that relate to teacher-desired objectives.
I was already doing quite a bit to incorporate UDL prior to the revision. I was allowing students to set goals, collaborate, use multi-mediums, choose their outcome of the project, and presenting information in multi-modalities as well. I didn’t take away a whole lot, but added to quite a bit. The resources from the UDL Toolkit will definitely be listed as possible Assistive Technologies for all students to have access to rather than those with Learning Disabilities. The revisions I did make, made my lesson that much better, as well as reaching many more learners on a deeper level.
References:
UDL At A Glance. (2010, January 6). YouTube. Retrieved December 1, 2013, from http://www.youtube.com/watch?v=bDvKnY0g6e4
